
What our end users experience on the platform matters to us. We wish to know where they are experiencing inconvenience, what they want, what they think, and where do they want us to improve. We pondered how we create a frictionless experience for our end users to share feedback and suggestions while targeting the right audience in Quixy.
We have introduced a feedback feature making it easy for our users to report any gap in experience, provide general feedback created by survey software and also suggest new features.
How does that work?
1. Access the feedback option from the help menu
Our users will now have access to the feedback option under the help menu
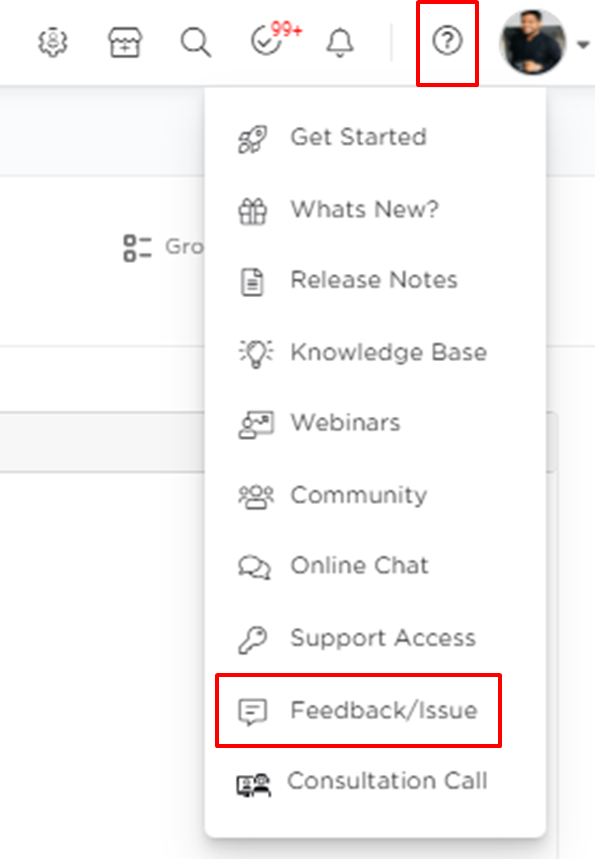
2. Feedback/Issue option initiates the feedback widget.
Users can use the widget to report issues, request new features, and provide general feedback
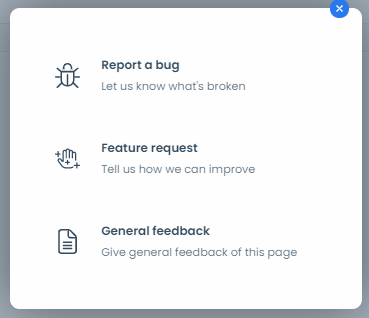
3. Let us now dive into each of the options available for the user
i. Report a Bug: Users can choose to report a bug/issue where they are expected to
- Add a title for the bug
- Provide a description of the issue/bug
- Attach / Capture screenshots
- Attach / Capture video
Note: Users’ Email ID is captured automatically.
Also Read: Quixy: The Top Choice to Build Tailored Customer Feedback Management Software
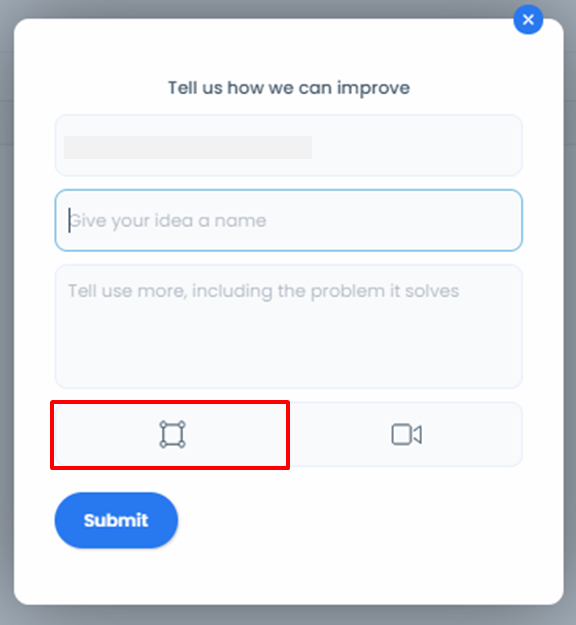
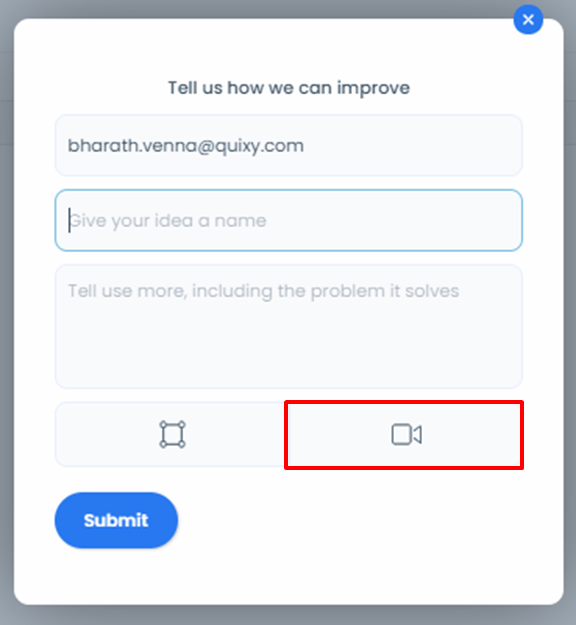
ii. Feature Request: The user has a provision to request for a new feature or upgrade to an existing feature as well. They are expected to
- Provide a title for the feature request
- Share the description of the problem they wish to solve with the requested feature
- Attach / Capture screenshots
- Attach / Capture video
Note: Users’ Email ID is captured automatically.
iii. General Feedback: In scenarios where the user is confused about whether to categorize their input as an Issue or Feature request, we have such a scenario covered with the final and equally powerful option i.e. General feedback. There are quite a few options for the user to choose from, namely:
- Selecting a Category of general feedback. User has the following options to choose from
- Bug
- Implementation
- Improvement
- Suggestion
- User can also define the priority of the observation or feedback. Available options for the user are
- Urgent
- High
- Neutral
- Low
- Attach / Capture screenshots
- Attach / Capture Video
Note: Users’ Email ID is captured automatically.
If you have been following us carefully, you may have observed that there are two options, namely “Attach a screenshot” and “Attach a video,” common across all three stated scenarios. Let us dive into the significance of these two options further and explore how these options can be a real deal winner for the users who wish to have their voice heard.
Also read: Designing and running Surveys made easy with Quixy’s No-Code platform
Attach/Capture a screenshot
Attaching a screenshot is one of the two ways for user to provide quality feedback with annotated screenshots. This is how it works
Step 1:
Select Attach screenshot option on the screen
Step 2:
The screen immediately goes into an annotation mode that looks like this
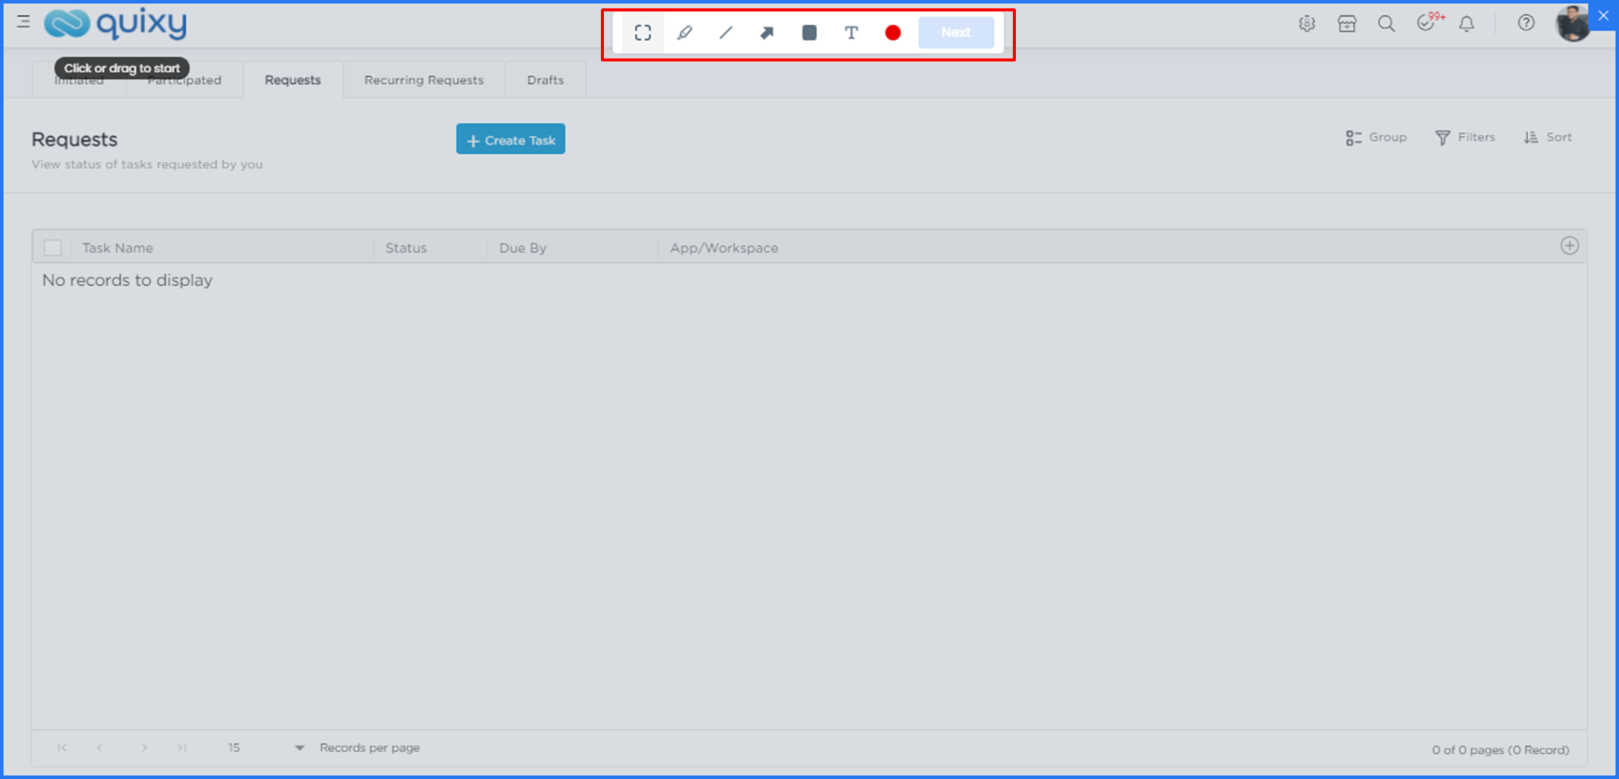
Step 3:
Start annotating with tools such as Highlighter, Pencil, Line, Arrow, Blackout, Comments, and Color Selector
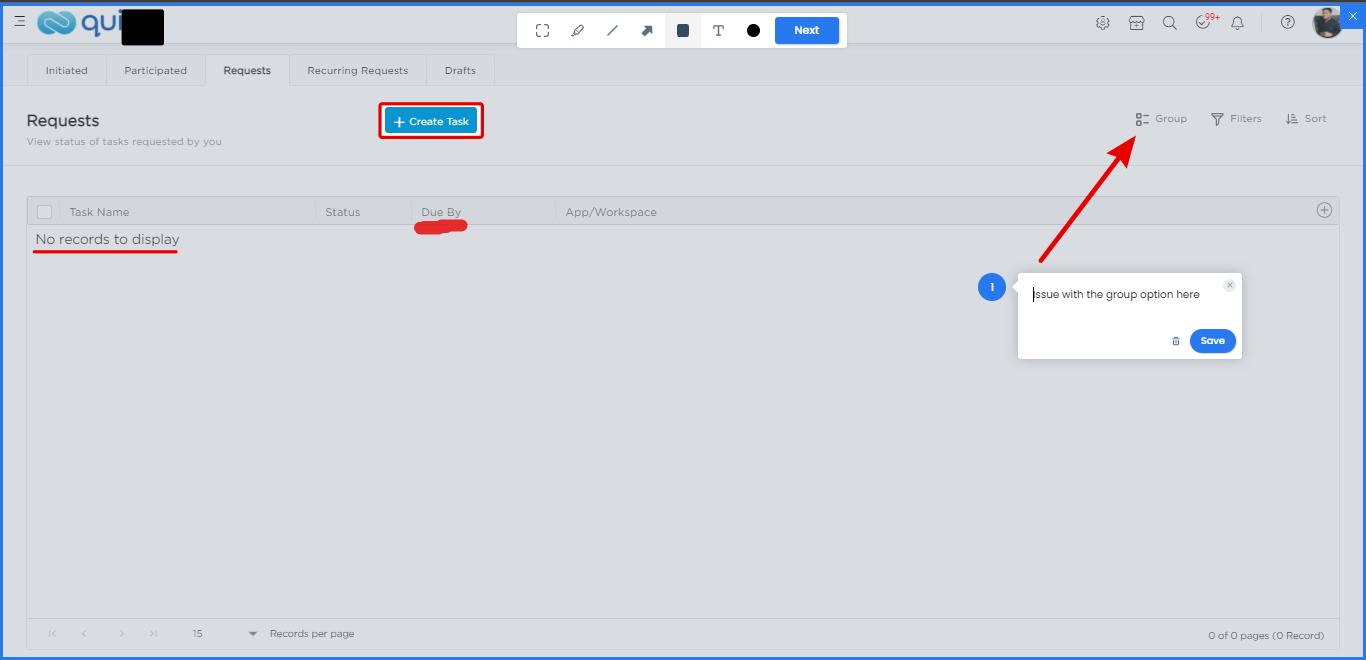
Once done with the required annotations, Clicking next will navigate the user back to the feedback form with the screenshot attached.
Step 4:
Wish to add more screenshots or delete the captured screenshots, the user is covered here.
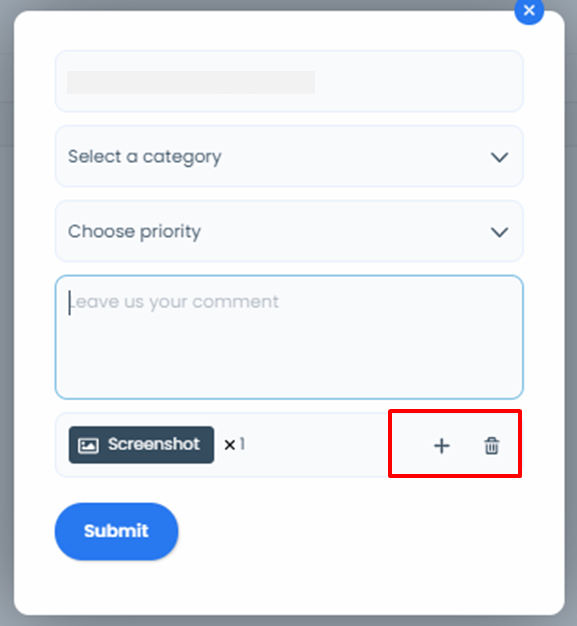
Step 5:
Save the feedback by clicking on the Submit button. Quixy team is notified about the issue or feedback that the user has provided.
Also Read: Accelerate workflows with Quixy Triggers & Quickflows
Attach / Capture a video
User can leverage the power of screen recording to capture feedback directly on the platform providing actionable feedback for the Quixy team. This is how it works
Step 1:
Select Attach Video option on the screen
Step 2:
The screen immediately goes into an annotation mode that looks like this
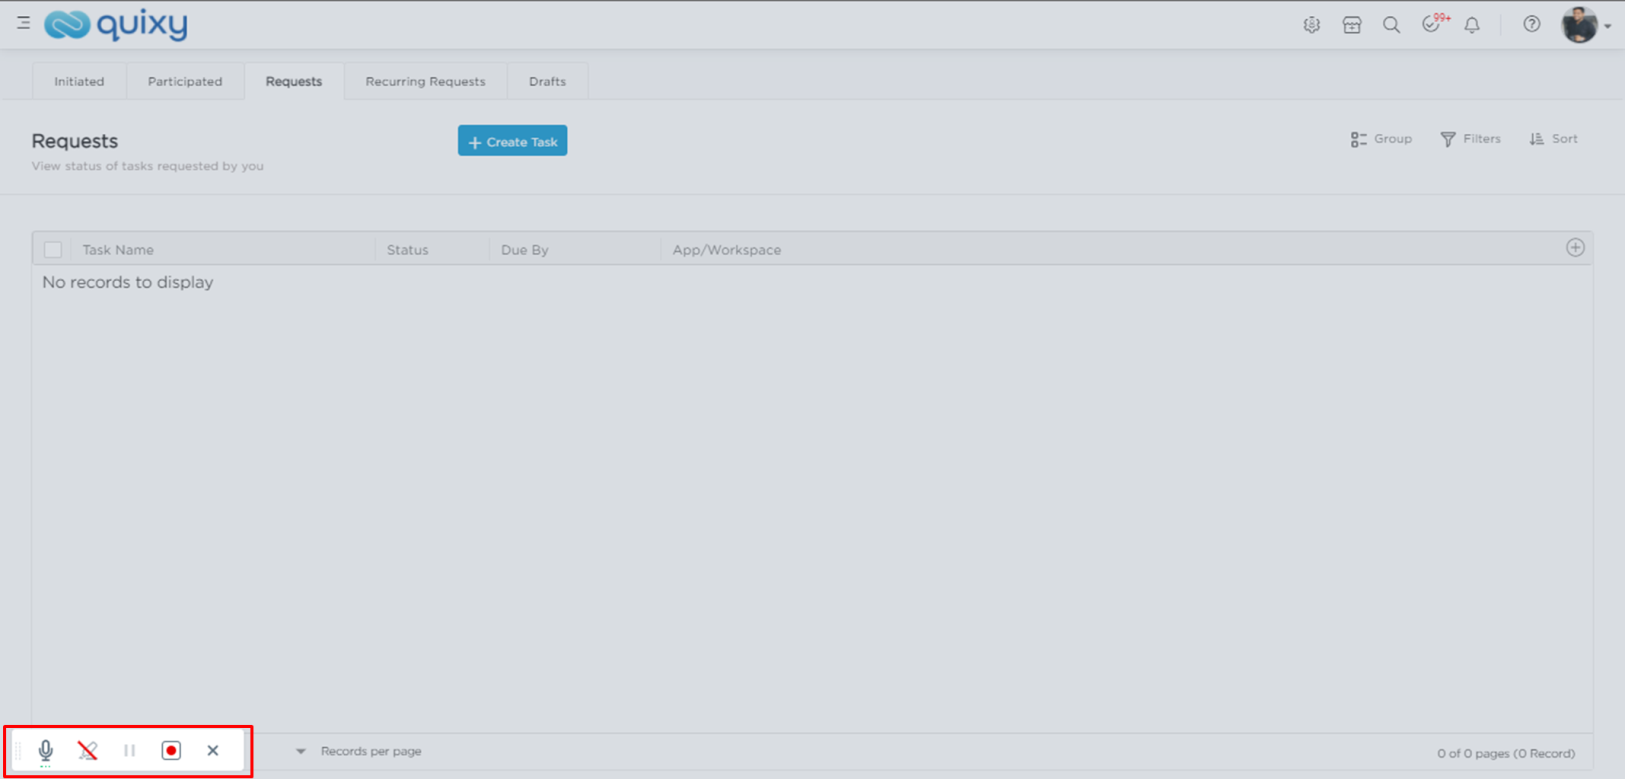
Step 3:
Start recording the user actions and leverage the draw tool to highlight sections or content on the screen. User has the option to voice over the issue so that they capture both audio and visual evidence of the issue.
User is allowed to capture only one video and user are advised to restrict the feedback to a maximum of 5 minutes in length.
Step 4:
Save the feedback by clicking on the Submit button. Quixy team is notified about the issue or feedback that the user has provided.
The user has submitted the feedback or reported an issue. What Next?
Our passionate team at Quixy closely monitors all the feedback and issues that are raised by the users. Within seconds of submitting the feedback or issue, the user would receive an email acknowledging the inputs from the user. One of our team members actively monitor and analyze the incoming feedback and issues and route the tickets internally to the concerned team.
We have an SLA in terms of hours to respond back to the users with a resolution or contact users for further details in case the description is not adequate.
While this is an easy way to report issues, users can also email the support team, chat with them or use our user documentation to get the help they need at any time.
Related Post


Login
Please login to comment
0 Comments
Oldest
Recent Posts


![]()

![]()
- Download the App